profile/2794InShot_20200819_165153281.jpg
Sabiunique720
15 Paid Android Apps, Now Free On The Play Store
~1.3 mins read
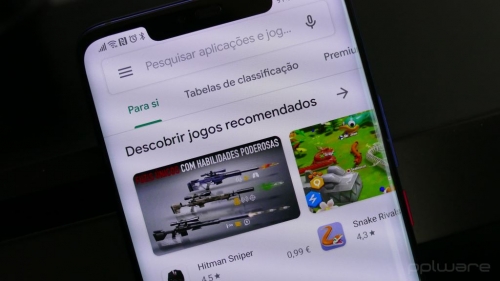
The Google Play Store is full of great apps available, much of it free. The fact that they are free, causes advertising to appear and some features are only exclusive to paid versions.
To give you access to some of these paid versions, without spending 1 cent, we bring you, once again, some suggestions of apps in promotions in the Google store.
The list of 15 applications we present includes games and icon packs and customizations, completely free. Some of the promotions end today, so don't waste time making your choices! Note that the prices shown are the original prices for each app, which are now free.
15 Paid Android Apps, Now Free on the Play Store
General Applications
Calc Fast 0,69 € (7 days) - 4.2 Stars
Sketch Me! Pro 1,59 € (6 days) - 4.2 Stars
Resize Me! Pro – Photo & Picture resizer 1,59 € (6 days) - 4.3 Stars
Analog Pink – Palette Pink – Film Filters 1,19 € (1 day) - 4.5 Stars
Games
Buff Knight Advanced – Retro RPG Runner 1,89 € (7 days) - 3.5 Stars
Space Shooter: Attack on the Galaxy (Premium) 0,59 € (5 days) - 4 Stars
Stickman Ghost 2: Gun Sword – Shadow Action RPG 2,09 € (6 days) - 4.3 Stars
The Lone Hacker 1,99 € (5 days) - 4 Stars
Zombie Age 3 Premium: Rules of Survival 0,99 € (4 days) - 4.3 Stars
Dungeon Shooter: The Forgotten Temple 0,99 € (2 days) - 4.2 Stars
Triple Fantasy Premium 5,49 € (6 days) - 4.3 Stars
Survival Derby 3D – car racing & running game 0,89 € (5 days) - 4.8 Stars
Icon packs and customizations
Pixel Nougat – Icon Pack 0,59 € (1 day) - 4.1 Stars
Benfo – Icon Pack 0,59 € (6 days) - 4.2 Stars
MIU 12 Icon Pack PRO (ORIGINAL) 2,49 € (4 days) - 4.9 Stars
The STAYAWAY COVID app is now available. Find out why you should install it ... no fears
profile/2794InShot_20200819_165153281.jpg
Sabiunique720
What To Consider When Taking Pictures With A Smartphone
~7.5 mins read
Before smartphones were introduced a good picture could only be taken by a professional photographer and that too at the studio. You would have to dress up, go to your preferred studio, and in the instance that the cameraman would be absent, the whole process would have to be repeated on another Sunday of choice.
Nowadays things have changed. Phone photography doesn’t implore such tedious processes and mental preparation. With a smartphone, you already hold the power to document and create beautiful memories at the snap of your fingers. No pun intended.
Nevertheless, taking good pictures takes more than pointing and shooting. Smartphone photographers leverage the following secrets and this is what you need to know when using a smartphone to take good pictures.
Turn on the camera gridlines
The easiest way to get balanced shots and improve the quality of your smartphone pictures is by using gridlines. Gridlines help you apply the rule of thirds by breaking down your shot into nine equal Aligning your subject within the lines or points of intersection helps you take shots that have more energy, tension and interest than if you were to simply centre the subject.
Use gridlines to place your subject strategically for more compelling pictures. Image from https://bit.ly/3gA2JM4
Such shots tend to be more outstanding when you have a lot of negative space.
2. Set up your shot
Now that you have your gridlines on, its time to use them. When taking a picture using a smartphone set up your shot and focus only on one interesting object. According to research , your subject shouldn’t fill the whole frame, instead, leave out two-thirds of the frame as negative space.
Tap on the screen to focus on the subject and once the circular icon appears, take the shot.
Location and Background matters
A good location and background will either support, emphasize or surround you as the subject creating a flattering look. Therefore, if you are outdoors, make sure your background promotes either of the above. If you are indoors, get creative by using uniquely patterned curtains, DIY backdrops or pieces of objects that you would enhance your picture. Such could include, artwork, flowers, fairy lights, balloons, interior decor or a softer plain coloured backdrop of your choice. Keep away from bold reds, blues, greens unless the lighting around you is done right to avoid reflecting such hues on your face.
Get a selfie stick or a phone tripod
You may be under the impression that selfie sticks are a diminishing trend, however, this is your secret to getting balanced shots and in different angles. A selfie stick also helps you assess your background, set up, pose and take shots confidently without having to rely on someone else – who may not get you the same results. Besides, a selfie stick allows you to take group photos, secures your camera phone without the risk of it falling, and you can take many shots without getting tired. Hence, if you are a selfie lover or a traveller who likes photos, invest in a selfie stick. It would be cumbersome to carry around a tripod, don’t you think?
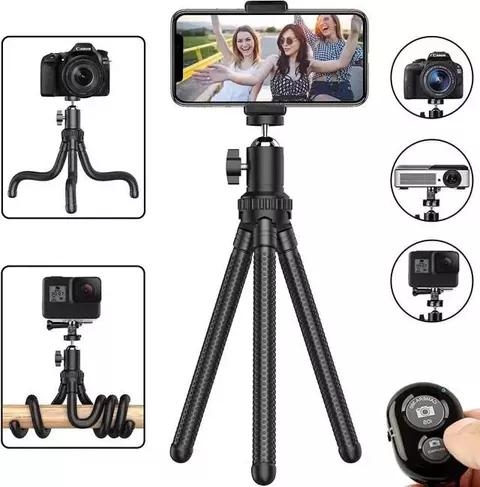
Another way to get great photos especially if you don’t have somebody to take your pictures and you need full shots not just selfies is for you to get a phone tripod which uses a wireless remote. You can get one for selfies, vlogging and streaming. There are many options out there – just look for one that is compatible with your phone. You can get one online or buy one at an electronics shop.
Image from https://www.amazon.com/Flexible-Adjustable-Wireless-Universal-Rotating/dp/B07HR5T8ZD
Create space between the subject and the background
After setting up your shot, try to create space between the subject and its background. Doing so places focus on the subject, ensuring that it remains crisp without the interference of any background noise. This technique also softens the background helping you take professional-looking photos.
Unless you are taking pictures of a product, resist the urge to have nothing on the background.
Do not zoom on the subject
Zooming causes the shot to pixelate which deteriorates the overall quality of the image. Since with a smartphone, you don’t have the luxury of different powerful optical lenses to get a good shot, move closer to the subject instead of zooming on it.
Use artificial lighting to your advantage
Quality shots need illumination to appear crisp and interesting. Nevertheless, the problem is usually where to place the light in order to take professional-looking shots. Fortunately, it’s not all that complicated. Place the light above or towards the subject rather than directly at the camera. This trick is useful, especially at night, which is when you may be tempted to use the flash on your phone.
Another trick you may notice with YouTubers is where they place a light source behind them. This lighting is what creates that halo effect Backlighting helps define facial features and creates a dramatic contrast between the subject and the background. This technique is very effective, especially when shooting portraits, and medium close-ups.
Additionally to get soft images with less noise and shadows, use the flash on your smartphone during the day.
Use manual exposure
Have you noticed that tapping on your phone to focus on different subjects or places also adjusts the light? To change this manually, swipe the vertical scale that appears once you open the camera app accordingly. By doing so you will be adjusting the exposure of your camera, allowing you to create the shots you desire.
Clean the lens
With a camera, it is only natural to clean the lens before you start shooting. However, rarely do we mind the state of our smartphone lens since they are small and of course, they rarely reveal smudges as on a camera. Thus, for good photos always clean the lens using a microfibre material, a soft cloth or a lens cloth if you have one.
Take as many pictures as you can
You may have seen the meme that states people take 49 pictures only to post one. Well with smartphone photography, taking many pictures is the secret to improving your skill and getting good shots. You may be surprised to see how photos taken at the same place could have a difference, even when the light or nothing else seemed to have changed.
Learn to use different modes
Auto is the default mode that most of us use. However, there’s a reason why phone cameras have other shooting modes. To get unique shots, its best to learn when and what environment suits the different mode and keep practising to perfect your art.
Shoot with no filters
Nowadays smartphones come with preset filters and other enhancements to help you create the best shots. However, most of these filters often compromise the quality of the photos making them appear unnatural and basic. Instead, try editing your pictures post-shooting. Google play store has different photo editing apps and you would be surprised to learn that even professionals use such to edit their photos. Adobe Photoshop Express . Snapseed, iPhoto and VSCO are examples of photo editing mobile apps that you can use to fine-tune your images without compromising the quality.
Leverage bold coloured makeup
Bold colours and patterns can take your shot to a whole other level, but so does bold coloured makeup. Accentuated red lipstick will make you stand out and add more vibrance to your picture than light coloured hues. That means for a proper smartphone photo shoot, make sure your makeup is more intense than you would normally. Retouch your lipstick, powder your face to get rid of oiliness and sweat and ensure that your outfit doesn’t clash with your makeup.
If you are wearing a natural look have bold coloured outfits textures. If your makeup is bold, stick to simple outfits for complementary purposes.
Another tip to remember is to keep your look as fresh as possible. This can be achieved by re-applying your makeup as necessary and keeping the look as matte as possible to avoid the makeup caking. Check out Dramatic Makeup Looks That Are Surprisingly Easy To Do
Emphasize your skin textures
If you have features that you love and would like to have them captured on your portrait, this would be the best time to take out your highlighter, faux eyelashes, and eye pencils.
Use highlighters to create a dewy effect or to shape your cheekbones and collarbones. False eyelashes are the go-to option for popping eyes, while your eye pencil can help you emphasize your beauty spots/birthmarks and eyebrows.
Night photoshoot
If you are taking pictures at night, use a lampshade or any source of lighting that is big and diffused. Small bulbs will be too harsh which will result in an unflattering look. To get good photos, ensure that artificial lighting hits you at eye level. Higher than this will only accentuate shadows while placing it at a lower level will end up looking like a scene from a horror movie.
For selfies, face in the light’s direction ensuring that light hits you towards your nose. Angle your camera to face down slightly, then snap.
Know your best angles
One thing celebrities have perfected from years of staying in front of the camera is knowing which side light hits them perfectly. Everyone has their best side and often you will see people inclined to pose showing this particular side. Thus take time to see which side is more flattering on your pictures and use it when taking shots in different angles.
Don’t limit yourself
If you do not mind preset phone filters, go ahead and use them. Nowadays smartphones come with enhanced A.I capabilities and apps like Instagram, Snapchat, come with different filters that you can use in your photos and selfies.
Phone filters can make your pictures pop too.
Advertisement

Link socials
Matches
Loading...